This is just a messed up pile of jots as I tried to solve a specific problem. The actual problem turned out to be between chair and keyboard, but I decided to post this anyhow, just in case it will be useful in the future.
The setting was like this: I had a script, which called a suid-enabled program I wrote (jailer.c), which did a chroot() to a chroot jail and then called setgroups(), setgid() and setuid(), and eventually an execl() to a bash script, which was of course inside the chroot jail.
So all in all, the program could be called from any user, but thanks to its setuid to root, it could change the root, and then turn into another user.
In the bash script, the control was eventually turned over to another program (not mine, hence the chroot protection) with the bash built-in command exec. And all was fine.
But then I needed to continue the execution after the program. So I dumped the exec and used the good old invocation by just starting the line with the program’s name. And that failed colossally.
Spoiler: The reason turned out to be that the current process ID remains when exec is used, and changes when other methods are used (duh). As some preparations to running the program had to match the process ID of the program running, exec worked, other methods didn’t. So it was really my bad.
After a while I thought I figured out that somehow, all this mucking around (playing with users? setuid? chroot?) caused the program to fail in finding its library files.
So I added a
export LD_LIBRARY_PATH=/lib64:/special/lib/lin64
line to the bash script, which made the program work. Finally. Only now it segfaulted. Well, at least I know I did something in the direction.
The problem seemed to be, that the program loaded an outdated libstdc++.so.6 file from its own library set, instead of the one in /usr/lib64/. LD_LIBRARY_PATH solved one issue, but since its paths are always handled before the regular one, it actually messed up.
Being in a chroot environment, everything is controlled, so why not add the standard libraries into LD_LIBRARY_PATH? Ugly, but nobody said being in a (chroot) jail should be nice.
So what is the regular order of loading libraries? Well, I went
$ ldconfig -v | less
and picked up the paths that live in the jail, and put them before the special paths. And then fixed LD_LIBRARY_PATH to
export LD_LIBRARY_PATH=/usr/lib64:/lib64:/special/lib/lin64
This solved the issue with libstdc++.so.6, but the segfault remained.
Epilogue: All this didn’t solve the problem, but rather kept me busy with complicated stuff, while the actual solution was so much simper. Maybe this will be useful for solving something else. Or I just wasted a few hours.
Introduction
My motivation for looking inside Vivado runs was that I wanted to implement a Vivado project from within XEmacs, using the Compile button, and all that within a rather tangled Makefile-based build system. But I also wanted to leave the possibility to open the project using Vivado’s GUI, if something went wrong or needed inspection. So working in non-project mode was out of the question.
On the face of it, the solution was simple: Just execute the runme.sh scripts in the run directories. Or use launch_runs in a Tcl script. Well, that sounds simple, but there is no output to console during these runs. In particular, the implementation is completely silent. I opted out the fun of staring on the cursor for an hour or so, having no idea what’s going on during the implementation. Leaving me no option but to get my hands a bit dirty.
This was written in February 2016 and relates to Vivado 2015.2. Feel free to update stuff in the comments below.
It’s recommended to first take a look on this page, which discusses other aspects of scripting.
Preparing the runs & OOCs
Vivado runs are just an execution of a Tcl script in one of the *.runs directories. This holds true for all runs, both Out-Of-Context runs (OOCs, e.g. IP cores) as well as synthesis and implementation runs.
Say that the project’s name is myproj, and the top-level module’s name is top.v (or top.vhd, if you insist). As the project is generated, Vivado creates a directory named myproj.run, which contains a set of subdirectories, for example fifo_32x512_synth_1/, fifo_8x2048_synth_1/, synth_1/ and impl_1/. In this example, the first two directories belong to two FIFO IPs, and the other two are implementation related.
synth_1 and impl_1 are most likely generated when the project is created in Vivado’s GUI, or with create_run Tcl calls if the project is generated with a setup scripts (again, take a look on this page). This is kinda out of scope here. The thing is to create and invoke the runs for the IPs (that is, the Out-Of-Context parts, OOCs).
In my personal preference, these OOCs are added to the project with the following Tcl snippet:
foreach i $oocs {
    if [file exists "$essentials_dir/$i/$i.dcp"] {
	read_checkpoint "$essentials_dir/$i/$i.dcp"
    } else {
	add_files -norecurse -fileset $obj "$essentials_dir/$i/$i.xci"
    }
}
To make a long story short, the idea is to include the DCP file rather than the XCI if possible, so the IP isn’t re-generated if it has already been so. Which means that the DCP file has to be deleted if the IP core’s attributes have been changed, or the changes won’t take any effect.
We’ll assume that the IPs were included as XCIs, because including DCPs requires no runs.
The next step is to create the scripts for all runs with the following Tcl command:
launch_runs -scripts_only impl_1 -to_step write_bitstream
Note that thanks to the -scripts_only flag, no run executes here, but just the run directories and their respective scripts. In particular, the IPs are elaborated, or generated, at this point. But not synthesized.
Building the OOCs
It’s a waste of time to run the IPs’ synthesis one after the other, as each synthesis doesn’t depend on the other. So a parallel launch can be done as follows:
First, obtain a list of runs to be run, and reset them:
set ooc_runs [get_runs -filter {IS_SYNTHESIS && name != "synth_1"} ]

foreach run $ooc_runs { reset_run $run }
The filter grabs the synthesis target of the IPs’ runs, and skips synth_1. Resetting is done, or Vivado complains it should.
Next, launch these specific runs in parallel:
if { [ llength $ooc_runs ] } {
  launch_runs -jobs 8 $ooc_runs
}
Note that ooc_runs may be an empty list, in particular if all IPs were loaded as DCPs before. If launch_runs is called with no runs, it fails with an error. To prevent this, $ooc_runs is checked first.
And then finally, wait for all runs to finish. wait_on_run can only wait on one specific run, but it’s fine looping on all launched runs. The loop will finish after the last run has finished:
foreach run $ooc_runs { wait_on_run $run }
Finally: Implementing the project
As mentioned above, launching a run actually consists of executing runme.sh (or runme.bat on Windows, never tried it). The runme.sh shell script sets the PATH with the current Vivado executable, and then invokes the following command with ISEWrap.sh as a wrapper:
vivado -log top.vds -m64 -mode batch -messageDb vivado.pb -notrace -source top.tcl
(Recall that “top” is the name of the toplevel module)
Spoiler: Just invoking the command above will execute the run with all log output going to console, but Vivado’s GUI will not reflect that the execution took place properly. More on that below.
It’s important to note that the “vivado” executable is invoked. This is in fact the way it’s done even when launched from within the GUI or with a launch_runs Tcl command. If the -jobs parameter is given to launch_runs, it will invoke the “vivado” executable several times in parallel. If you want to convince yourself that this indeed happens, note that you get something like this in the console inside Vivado’s GUI, which is exactly what Vivado prints out when invoked from the command line:
****** Vivado v2015.2 (64-bit)
  **** SW Build 1266856 on Fri Jun 26 16:35:25 MDT 2015
  **** IP Build 1264090 on Wed Jun 24 14:22:01 MDT 2015
    ** Copyright 1986-2015 Xilinx, Inc. All Rights Reserved.
Vivado’s invocation involves three flags that are undocumented:
- The -notrace flag simply means that Vivado doesn’t print out the Tcl commands it executes, which it would otherwise do by default. I drop this flag in my own scripts: With all the mumbo-jumbo that is emitted anyhow, the Tcl commands are relatively informative.
- The -m64 probably means “run in 64 bit mode”, but I have no idea.
- The -messageDb seems to set the default message *.pb output, which is probably some kind of database from which the GUI takes its data to present in the Message tab. Note that the main Tcl script for impl_1 (e.g. top.tcl) involves several calls to create_msg_db followed by close_msg_db, which is probably how the implementation run has messages divided into subcategories. Just my guesses, since nothing of this is documented (not even these Tcl commands).
The ISEWrap.sh wrapper is crucially important if you want to be able to open the GUI after the implementation and work as if it was done in the GUI: It makes it possible for the GUI to tell which run has started, completed or failed. Namely, it creates two files, one when the run starts, and one when it ends.
For example, during the invocation of a run, .vivado.begin.rst is created (note the “hidden file name” starting with a dot), and contains something like this:
<?xml version="1.0"?>
<ProcessHandle Version="1" Minor="0">
    <Process Command="vivado" Owner="eli" Host="myhost.localdomain" Pid="1003">
    </Process>
</ProcessHandle>
And if the process terminates successfully, another empty file is created, .vivado.end.rst. If it failed, the empty file .vivado.error.rst is created instead. The synth_1 run creates only these two, but as for impl_1, individual files are generated for each step in the implementation Tcl script by virtue of file-related Tcl commands, e.g. .init_design.begin.rst, .place_design.begin.rst etc (and also end scripts). And yes, the run system is somewhat messy in that these files are created in several different ways.
If these files aren’t generated, the Vivado GUI will get confused on whether the runs have taken place or not. In particular, the synth_1 run will stand at “Scripts Generated” even after a full implementation.
Bottom line
Recall that the reason for all this diving into the Vivado runs mechanism, was to perform these runs with log output on the console.
The ISEWrap.sh wrapper (actually, the way it’s used) is the reason why there is no output to console during the run’s execution. The end of runme.sh goes:
ISEStep="./ISEWrap.sh"
EAStep()
{
     $ISEStep $HD_LOG "$@" >> $HD_LOG 2>&1
     if [ $? -ne 0 ]
     then
         exit
     fi
}

# pre-commands:
/bin/touch .init_design.begin.rst
EAStep vivado -log top.vdi -applog -m64 -messageDb vivado.pb -mode batch -source top.tcl -notrace
The invocation of vivado is done by calling EAStep() with the desired command line as arguments. This is passed on by EAStep() to the wrapper as arguments, which in turn executes vivado as required, along with the creating of the begin-end files. But note the redirection (marked in red) to the log file. It goes there, but not to console.
So one possibility is to rewrite runme.sh slightly, and modify EAStep() so it uses the “tee” UNIX utility or doesn’t redirect at all into a log file. Or modify the wrapper for your own needs. I went for option B (there were plenty of scripts anyhow in my build system).
This is documented everywhere, and still, I always find myself messing around with this. So once and for all:
The files
In any user’s .ssh/ directory, there should be (among others) two files: id_rsa and id_rsa.pub. Or maybe with dsa instead of rsa. Doesn’t matter too much. These are the keys that are used when you try to login from this account to another host.
id_rsa is the secret key, and is id_rsa.pub is public. The former should be readable only by the user (and root), and the latter by anyone. If anyone has the secret key, he or she may login to whatever host that identifies you with it.
If these files aren’t in .ssh/, they can be generated with ssh-keygen. This should be done once for each new shell account you generate, and maybe even once in a lifetime: It’s much more convenient to copy these files from your old user account, or you’ll have to re-establish the automatic login on each remote server with the new key.
So it goes:
$ ssh-keygen
Generating public/private rsa key pair.
Enter file in which to save the key (/home/eli/.ssh/id_rsa):
Enter passphrase (empty for no passphrase):
Enter same passphrase again:
Your identification has been saved in /home/eli/.ssh/id_rsa.
Your public key has been saved in /home/eli/.ssh/id_rsa.pub.
The key fingerprint is:
77:7c:bf:4d:3b:a9:8a:e7:56:09:24:03:6f:22:d7:ca eli@myhost.localdomain
The key's randomart image is:
+--[ RSA 2048]----+
|       ..        |
|        oo .     |
|     . o ++      |
|      + +  o     |
|       ES . + o  |
|         . . + . |
|            .   +|
|          .o   ++|
|         .+o...oo|
+-----------------+
The public key file (id_rsa.pub) looks something like this:
ssh-rsa AAAAB3NzaC1yc2EAAAABIwAAAQEAs/ggsf1ZXbvyqQ7NbzIT+UDnGqo1LOgV3PpEUpVt8lw44jDgDCNGXXMZepMVwp3LgcGPKrrZ4n7b9/5zgXVrH86HZVyi+guu0IWLsYA4K+OgQY0m6rmXss/v7lt6ItIZTTJWhgTr4E8DE8+9PibYfBrvdITxdVAVl+FxmDEHhunnMzeqUsTMD7hniEWvlvHE0aE6Gp2rQPMU5sx3+LEGJ4y1BDzChrNa6dc2L7GP1ViGaP9SZBYVFPqbdkdCOOoR6N+FU/VHYIBeK5RdkTkfxGHKHfec1p8sXzveDHT69ouDaw0+c+3j2KlNq4ugnbTGKWrJaQBxQBEzvLgTdePCtQ== eli@myhost.localdomain
Note the eli@myhost.localdomain part at the end. It has no significance crypto-wise. It’s considered a comment. More about it below.
The private (secret) file, id_rsa, looks something like this (I don’t really use it, right? Don’t publish your public key!)
-----BEGIN RSA PRIVATE KEY-----
MIIEoQIBAAKCAQEAs/ggsf1ZXbvyqQ7NbzIT+UDnGqo1LOgV3PpEUpVt8lw44jDg
DCNGXXMZepMVwp3LgcGPKrrZ4n7b9/5zgXVrH86HZVyi+guu0IWLsYA4K+OgQY0m
6rmXss/v7lt6ItIZTTJWhgTr4E8DE8+9PibYfBrvdITxdVAVl+FxmDEHhunnMzeq
UsTMD7hniEWvlvHE0aE6Gp2rQPMU5sx3+LEGJ4y1BDzChrNa6dc2L7GP1ViGaP9S
ZBYVFPqbdkdCOOoR6N+FU/VHYIBeK5RdkTkfxGHKHfec1p8sXzveDHT69ouDaw0+
c+3j2KlNq4ugnbTGKWrJaQBxQBEzvLgTdePCtQIBIwKCAQAFJFi0oNaq6BzgQkBi
Q0JmNQ3q0am/dFhlZjx3Y1rpqt0NxuHUdglTIIuzC4RHY5gZpnHOBVausyrbMyff
IJypIyhwnD8rtzDhYua77bh2SFUJL+srRyGXZQba7Ku32h365C5bmb2YsczjTxQJ
Fw1/44MvNv+VozPRI7LJ1YPfSHanPoc77ZvKC/5hsXBgBioIaacO63HNaUeSgIwg
WTNo3zjRBGHPsDmNIR0rMT1STlpMQ/2kJ4BzV0HKKc0F6rDazIDTKTXBiziRSKfM
ftbayNu0iqCcGJWLvMlTNYB36VXBrb3NcKiFfsx99xIKvtG/UV/Slh7wz/ol2PnP
KTmrAoGBAOYpirjibbF2kP2zD6jJi/g6BiKl2xPumzFCEurqgLRWdT5Ns3hbS+F1
c/WhZyCRuYK/ZlQTo7D+FCE9Vft5nsSnZLpOu9kJ2pW4LuAfpNVQCvAcjtRWmMcX
dl0pH68/rdfC/oO3oMcUY8tZrJ/4NOD6dUyXZ+Ahjr5lEznFQWhNAoGBAMgsIHQ+
2s35g6J586msjg1xKUBqkgg88xqdJmSh/kp6krIi7+rGT5so3EOmjw0C6Ks8TVDf
C9RR+HuVOj7wNR9XhS4mlxTgnQyWdox8POqK4NBSdNMoqfMs9fqDBLtR9vItTcel
5hKD740ZF4ktaTgG1WMHElYyE0Iq+rJd/3gJAoGAdl6B220ieIYerlwWrpOJ0B3X
RQTXEZCnlazzyUVmwyUmWo5cTIa5T2D5zsgJJrFYF1seruWHYlbIhh+LTiFKVoH5
Sd9ZSwxhyVdokIVNdQSX6TNCJA9HQdGNVHuMo0VSFzEVLcwmzMioWfOam2m0y3l+
J2PPBY2Z3kKcLFbRLlMCgYEAvLvkFdTc7hckV10KT4Vv/gub7Ec5OvejYjxmBxxk
yeFIfBJP6/zOtt1h9qRa/aOoLGwOYjFi7MJQrwkLCCRPWBCwxR0SGv+qBI3dfSSu
dr104azUjJQN8+iQJrYLxo8cCOji73CId9t7dmgdgVazqdqOrdN3sFsZeOax21/w
3uMCgYBa0ZqQiFgL/sYUYysgqCF6N+aL/Nr19tdp/025feZgwG/9Q1196YTUiADn
jQzU3vpFpTpMnvTybE/+Zq3nGPXthOnsUBRK0/Lc5I8Ofgc9s9T0YrLwio6FGTAm
Hj0oC0CwrDMtSPtm7HOG+wpA4qxO6gf3OkgGzfZccyZjB2NiDQ==
-----END RSA PRIVATE KEY-----
How it works
The gory details left aside, the authentication goes like this: When you attempt to log in, your ssh client checks your .ssh/ directory for the key files. If it finds such, it notifies the server that it wants to try these key files, and sends information on the public keys it has.
The server on the remote host looks up the user’s home directory for a .ssh/authorized_keys file. If such exists, it should find a line that is identical to the id_rsa.pub file on the client’s side. If such match is found, the server uses the public key to create a challenge for the client. The client, which has the secret key passes this challenge, and the authentication is done.
So .ssh/authorized_keys is just a concatenation of id_rsa.pub files, each line for a different key.
Now to the eli@myhost.localdomain part I mentioned above. It goes into the .ssh/authorized_keys file as well. It’s there to help people, who have several authentication keys for logging in from different computers, to keep track which line in .ssh/authorized_keys belongs to which. Just in case they wanted to delete a line or so.
Important: The home directory’s on the remote host must not be writable by anyone else than the user (and root, of course), or ssh will ignore authorized_keys. In other words, the home directory’s permission can be 0755 for example (viewable by all, but writable by user only) or more restrictive, but if it’s 0775 or 0777, password-less login will not work. Rationale: If someone else can rename and replace your .ssh directory, that someone else can log in to your account.
Making the remote host recognize you
There’s a command-line utility for this, namely ssh-copy-id. It merely uses SSH to log into the remote host (this time a password will be required, or why are you doing this?). All it does is to append id_rsa.pub to .ssh/authorized_keys on the remote host. That is, in fact, all that is required.
Alternatively, manually copy the line from id_rsa.pub into .ssh/authorized_keys.
Remember that there is no problem disclosing id_rsa.pub to anyone. It’s really public. It’s the secret file you need to keep to yourself. And it’s quite easy to tell the difference between the two.
Having multiple SSH keys
It’s sometimes required to maintain multiple SSH keys. For example, in order to access Github as multiple users.
First, create a new SSH key pair:
$ ssh-keygen
Generating public/private rsa key pair.
Enter file in which to save the key (/home/eli/.ssh/id_rsa): id_rsa_github2
Note that the utility allows choosing a different file name. This is how a new key pair lives side-by-side with the existing one.
The next step is to create (or edit) .ssh/config. This file should have permission mode 0600 (accessible only to user) because it’s sensitive by its nature, but also because ssh may ignore it otherwise. See “man ssh_config”.
Now let’s follow the scenario of multiple keys on Github. Say that .ssh/config reads as follows:
# Github access as second user
Host github-amigo
  HostName github.com
  User git
  IdentityFile ~/.ssh/id_rsa_github2
If no entry in the config file matches, ssh uses the default settings. So existing ssh connections remain unaffected. In other words, this impacts only the host name that we’ve just invented. No need to state the default behavior explicitly. No collateral damage.
It’s of course possible to add several entries as shown above.
The setting above means is that ssh now recognizes “github-amigo” as a legit name of a host. If that name is used, ssh will connect with github.com, identify itself as “git” and use the said key.
It’s hence perfectly reasonable to connect with github.com with something like:
$ ssh github-amigo
PTY allocation request failed on channel 0
Hi amigouser! You've successfully authenticated, but GitHub does not provide shell access.
Connection to github.com closed.
The line in .git/config is accordingly
[remote "github"]
        url = github-amigo:amigouser/therepository.git
        fetch = +refs/heads/*:refs/remotes/github/*
In the url, the part before the colon is the name of the host. There is no need to state the user’s name, because ssh fills it in anyhow. After the colon, it’s the name of the repository.
A successful session
If it doesn’t work, the -v flag can be used to get debug info on an ssh session. This is what it looks like when it’s OK. YMMV.
$ ssh -v remotehost.org
OpenSSH_5.3p1, OpenSSL 1.0.0b-fips 16 Nov 2010
debug1: Reading configuration data /etc/ssh/ssh_config
debug1: Applying options for *
debug1: Connecting to remotehost.org [84.200.84.244] port 22.
debug1: Connection established.
debug1: identity file /home/eli/.ssh/identity type -1
debug1: identity file /home/eli/.ssh/id_rsa type 1
debug1: identity file /home/eli/.ssh/id_dsa type -1
debug1: Remote protocol version 2.0, remote software version OpenSSH_5.3
debug1: match: OpenSSH_5.3 pat OpenSSH*
debug1: Enabling compatibility mode for protocol 2.0
debug1: Local version string SSH-2.0-OpenSSH_5.3
debug1: SSH2_MSG_KEXINIT sent
debug1: SSH2_MSG_KEXINIT received
debug1: kex: server->client aes128-ctr hmac-md5 none
debug1: kex: client->server aes128-ctr hmac-md5 none
debug1: SSH2_MSG_KEX_DH_GEX_REQUEST(1024<1024<8192) sent
debug1: expecting SSH2_MSG_KEX_DH_GEX_GROUP
debug1: SSH2_MSG_KEX_DH_GEX_INIT sent
debug1: expecting SSH2_MSG_KEX_DH_GEX_REPLY
debug1: checking without port identifier
debug1: Host 'remotehost.org' is known and matches the RSA host key.
debug1: Found key in /home/eli/.ssh/known_hosts:50
debug1: found matching key w/out port
debug1: ssh_rsa_verify: signature correct
debug1: SSH2_MSG_NEWKEYS sent
debug1: expecting SSH2_MSG_NEWKEYS
debug1: SSH2_MSG_NEWKEYS received
debug1: SSH2_MSG_SERVICE_REQUEST sent
debug1: SSH2_MSG_SERVICE_ACCEPT received
debug1: Authentications that can continue: publickey,gssapi-keyex,gssapi-with-mic,password
debug1: Next authentication method: gssapi-with-mic
debug1: Unspecified GSS failure.  Minor code may provide more information
Credentials cache file '/tmp/krb5cc_1010' not found

debug1: Unspecified GSS failure.  Minor code may provide more information
Credentials cache file '/tmp/krb5cc_1010' not found

debug1: Unspecified GSS failure.  Minor code may provide more information

debug1: Next authentication method: publickey
debug1: Offering public key: /home/eli/.ssh/id_rsa
debug1: Server accepts key: pkalg ssh-rsa blen 277
debug1: Authentication succeeded (publickey).
debug1: channel 0: new [client-session]
debug1: Requesting no-more-sessions@openssh.com
debug1: Entering interactive session.
debug1: Sending environment.
debug1: Sending env XMODIFIERS = @im=none
debug1: Sending env LANG = en_US.UTF-8
And shell prompt comes next.
… and then it didn’t work
Fast forward to December 2024 and with a OpenSSH_9.2p1 client (Debian-2+deb12u3, OpenSSL 3.0.15 3 Sep 2024), I failed to log in password-less into a really old ssh server:
$ ssh -v theserver.com
[ ... ]
debug1: Authentications that can continue: publickey,password
debug1: Next authentication method: publickey
debug1: Offering public key: /home/theuser/.ssh/id_rsa RSA SHA256:LKkjdfrgkGfdjgKJ35AfNKJYL+fIQ
debug1: send_pubkey_test: no mutual signature algorithm
debug1: Trying private key: /home/theuser/.ssh/id_ecdsa
debug1: Trying private key: /home/theuser/.ssh/id_ecdsa_sk
debug1: Trying private key: /home/theuser/.ssh/id_ed25519
debug1: Trying private key: /home/theuser/.ssh/id_ed25519_sk
debug1: Trying private key: /home/theuser/.ssh/id_xmss
debug1: Trying private key: /home/theuser/.ssh/id_dsa
debug1: Next authentication method: password
[ ... ]
Following this Q&A (the same person asking and answering), I tried:
$ ssh -v -o "PubkeyAcceptedAlgorithms=+ssh-rsa" theserver.com
And than worked, surprisingly enough!
[ ... ]
debug1: Authentications that can continue: publickey,password
debug1: Next authentication method: publickey
debug1: Offering public key: /home/theuser/.ssh/id_rsa RSA SHA256:LKkjdfrgkGfdjgKJ35AfNKJYL+fIQ
debug1: Server accepts key: /home/theuser/.ssh/id_rsa RSA SHA256:LKkjdfrgkGfdjgKJ35AfNKJYL+fIQ
Authenticated to theserver.com ([193.12.56.12]:22) using "publickey".
debug1: channel 0: new session [client-session] (inactive timeout: 0)
debug1: Requesting no-more-sessions@openssh.com
[ ... ]
Possibly add this line to /etc/ssh/ssh_config (or to your local ~/.ssh/config):
PubkeyAcceptedAlgorithms +ssh-rsa
Why did it help? I have no idea. Even before the change in the config file, the query on the said variable listed ssh-rsa as one of the candidates:
$ ssh -Q PubkeyAcceptedAlgorithms
So not clear what happened here.
Intro
This is a minimal HOWTO on installing Linux Malware Detect for occasional use as a regular non-root user. Not that I’m so sure it’s worth bothering, given that contemporary exploit code seems to be able to go under its radar.
Background
One not-so-bright afternoon, I got a sudden mail from my web hosting provider saying that my account has been shut down immediately due to malware detected in my files (citation is slightly censored):
Hello,
Our routine malware scanner has reported files on your account as malicious. Pasted below is the report for your confirmation. Your account hosts old, outdated and insecure scripts which needs to be updated asap. Please reply back to this email so that we can work this out.
====================================
HOST: ——-
SCAN ID: 151230-0408.31792
STARTED: Dec 30 2015 04:08:40 -0500
TOTAL HITS: 1
TOTAL CLEANED: 0
FILE HIT LIST:
{HEX}php.base64.v23au.185 : /home/——/public_html/modules/toolbar/javascript21.php => /usr/local/maldetect/quarantine/javascript21.php.295615562
===============================================
I was lucky enough to have a backup of my entire hosted subdirectory, so I made a new backup, ran
$ find . -type f | while read i ; do sha1sum "$i" ; done > ../now-sha1.txt
on the good and bad, and then compared the output files. This required some manual cleanup of several new PHP files which contained all kind of weird stuff.
In hindsight, it seems like the malware PHP files were created during an SQL injection attack on Drupal 7 back in October 2014 (read again: an SQL injection attack in 2014. It’s as if a malaria breakout would occur in Europe today). The web host did patch the relevant file for me (without me knowing about it, actually), but only a couple of days after the attack broke loose. Then the files remained undetected for about a year, after which only one of these was nailed down. The malware PHP code is clearly crafted to be random, so it works around pattern detection.
Now, when we’re convinced that Linux Malware Detect actually doesn’t find malware, let’s install it.
Installing
There are plenty of guides on the web. Here’s my own take.
$ git clone https://github.com/rfxn/linux-malware-detect.git
For those curious on which revision I’m using:
$ git rev-parse HEAD
190f56e8704213fab233a5ac62820aea02a055b2
Change directory to linux-malware-detect/, and as root:
# ./install.sh
Linux Malware Detect v1.5
            (C) 2002-2015, R-fx Networks <proj@r-fx.org>
            (C) 2015, Ryan MacDonald <ryan@r-fx.org>
This program may be freely redistributed under the terms of the GNU GPL

installation completed to /usr/local/maldetect
config file: /usr/local/maldetect/conf.maldet
exec file: /usr/local/maldetect/maldet
exec link: /usr/local/sbin/maldet
exec link: /usr/local/sbin/lmd
cron.daily: /etc/cron.daily/maldet
maldet(15488): {sigup} performing signature update check...
maldet(15488): {sigup} could not determine signature version
maldet(15488): {sigup} signature files missing or corrupted, forcing update...
maldet(15488): {sigup} new signature set (2015121610247) available
maldet(15488): {sigup} downloading http://cdn.rfxn.com/downloads/maldet-sigpack.tgz
maldet(15488): {sigup} downloading http://cdn.rfxn.com/downloads/maldet-cleanv2.tgz
maldet(15488): {sigup} verified md5sum of maldet-sigpack.tgz
maldet(15488): {sigup} unpacked and installed maldet-sigpack.tgz
maldet(15488): {sigup} verified md5sum of maldet-clean.tgz
maldet(15488): {sigup} unpacked and installed maldet-clean.tgz
maldet(15488): {sigup} signature set update completed
maldet(15488): {sigup} 10822 signatures (8908 MD5 / 1914 HEX / 0 USER)
Reduce installation
Remove cronjobs: First /etc/cron.d/maldet_pub
*/10 * * * * root /usr/local/maldetect/maldet --mkpubpaths >> /dev/null 2>&1
and also /etc/cron.daily/maldet (scan through everything daily, I suppose):
#!/usr/bin/env bash
export PATH=/bin:/sbin:/usr/bin:/usr/sbin:/usr/local/bin:/usr/local/sbin:$PATH
export LMDCRON=1
. /usr/local/maldetect/conf.maldet
if [ -f "/usr/local/maldetect/conf.maldet.cron" ]; then
	. /usr/local/maldetect/conf.maldet.cron
fi
find=`which find 2> /dev/null`
if [ "$find" ]; then
	# prune any quarantine/session/tmp data older than 7 days
	tmpdirs="/usr/local/maldetect/tmp /usr/local/maldetect/sess /usr/local/maldetect/quarantine /usr/local/maldetect/pub"
	for dir in $tmpdirs; do
	 if [ -d "$dir" ]; then
	  $find $dir -type f -mtime +7 -print0 | xargs -0 rm -f >> /dev/null 2>&1
	 fi
	done
fi

if [ "$autoupdate_version" == "1" ] || [ "$autoupdate_signatures" == "1" ]; then
	# sleep for random 1-999s interval to better distribute upstream load
	sleep $(echo $RANDOM | cut -c1-3) >> /dev/null 2>&1
fi

if [ "$autoupdate_version" == "1" ]; then
	# check for new release version
	/usr/local/maldetect/maldet -d >> /dev/null 2>&1
fi

if [ "$autoupdate_signatures" == "1" ]; then
	# check for new definition set
	/usr/local/maldetect/maldet -u >> /dev/null 2>&1
fi

# if we're running inotify monitoring, send daily hit summary
if [ "$(ps -A --user root -o "cmd" | grep maldetect | grep inotifywait)" ]; then
        /usr/local/maldetect/maldet --monitor-report >> /dev/null 2>&1
else
	if [ -d "/home/virtual" ] && [ -d "/usr/lib/opcenter" ]; then
		# ensim
	        /usr/local/maldetect/maldet -b -r /home/virtual/?/fst/var/www/html/,/home/virtual/?/fst/home/?/public_html/ 1 >> /dev/null 2>&1
	elif [ -d "/etc/psa" ] && [ -d "/var/lib/psa" ]; then
		# psa
		/usr/local/maldetect/maldet -b -r /var/www/vhosts/?/ 1 >> /dev/null 2>&1
        elif [ -d "/usr/local/directadmin" ]; then
                # DirectAdmin
                /usr/local/maldetect/maldet -b -r /home?/?/domains/?/public_html/,/var/www/html/?/ 1 >> /dev/null 2>&1
	elif [ -d "/var/www/clients" ]; then
		# ISPConfig
                /usr/local/maldetect/maldet -b -r /var/www/clients/?/web?/web 1 >> /dev/null 2>&1
	elif [ -d "/etc/webmin/virtual-server" ]; then
		# Virtualmin
                /usr/local/maldetect/maldet -b -r /home/?/public_html/,/home/?/domains/?/public_html/ 1 >> /dev/null 2>&1
	elif [ -d "/usr/local/ispmgr" ]; then
		# ISPmanager
		/usr/local/maldetect/maldet -b -r /var/www/?/data/,/home/?/data/ 1 >> /dev/null 2>&1
	elif [ -d "/var/customers/webs" ]; then
		# froxlor
		/usr/local/maldetect/maldet -b -r /var/customers/webs/ 1 >> /dev/null 2>&1
	else
		# cpanel, interworx and other standard home/user/public_html setups
	        /usr/local/maldetect/maldet -b -r /home?/?/public_html/,/var/www/html/,/usr/local/apache/htdocs/ 1 >> /dev/null 2>&1
	fi
fi
And then remove the bootup hooks (I could and should have done this with chkconfig, actually):
# rm `find /etc/rc.d/ -iname S\*maldet\*`
rm: remove symbolic link `/etc/rc.d/rc3.d/S70maldet'? y
rm: remove symbolic link `/etc/rc.d/rc4.d/S70maldet'? y
rm: remove symbolic link `/etc/rc.d/rc2.d/S70maldet'? y
rm: remove symbolic link `/etc/rc.d/rc5.d/S70maldet'? y
Configuration
Edit /usr/local/maldetect/conf.maldet. The file is self-explained. The defaults are quite non-intrusive (no quarantine nor cleaning by default, no user suspension etc.). I turned off the automatic updates (I don’t run this as a cron job anyhow) and opted in scans by users:
scan_user_access="1"
Other than that, I kept it as is.
Preparing for run as non-root user
As a regular user (“eli”) I went
$ maldet
touch: cannot touch `/usr/local/maldetect/pub/eli/event_log': No such file or directory
/usr/local/maldetect/internals/functions: line 31: cd: /usr/local/maldetect/pub/eli/tmp: No such file or directory
mkdir: cannot create directory `/usr/local/maldetect/pub/eli': Permission denied
chmod: cannot access `/usr/local/maldetect/pub/eli/tmp': No such file or directory
mkdir: cannot create directory `/usr/local/maldetect/pub/eli': Permission denied
chmod: cannot access `/usr/local/maldetect/pub/eli/sess': No such file or directory
mkdir: cannot create directory `/usr/local/maldetect/pub/eli': Permission denied
chmod: cannot access `/usr/local/maldetect/pub/eli/quar': No such file or directory
sed: couldn't open temporary file /usr/local/maldetect/sedIuE2ll: Permission denied

[...]
So it expects a directory accessible by non-root self. Let’s make one (as root)
# cd /usr/local/maldetect/pub/
# mkdir eli
# chown eli:eli eli
Giving it a try
Try
$ maldet -h
And performing a scan (checking a specific sub-directory on my Desktop):
$ maldet -a /home/eli/Desktop/hacked/
sed: couldn't open temporary file /usr/local/maldetect/sedcSyxa1: Permission denied
Linux Malware Detect v1.5
            (C) 2002-2015, R-fx Networks <proj@rfxn.com>
            (C) 2015, Ryan MacDonald <ryan@rfxn.com>
This program may be freely redistributed under the terms of the GNU GPL v2

ln: creating symbolic link `/usr/local/maldetect/sigs/lmd.user.ndb': Permission denied
ln: creating symbolic link `/usr/local/maldetect/sigs/lmd.user.hdb': Permission denied
/usr/local/maldetect/internals/functions: line 1647: /usr/local/maldetect/tmp/.runtime.hexsigs.18117: Permission denied
maldet(18117): {scan} signatures loaded: 10822 (8908 MD5 / 1914 HEX / 0 USER)
maldet(18117): {scan} building file list for /home/eli/Desktop/hacked/, this might take awhile...
maldet(18117): {scan} setting nice scheduler priorities for all operations: cpunice 19 , ionice 6
maldet(18117): {scan} file list completed in 0s, found 8843 files...
maldet(18117): {scan} scan of /home/eli/Desktop/hacked/ (8843 files) in progress...
maldet(18117): {scan} 8843/8843 files scanned: 0 hits 0 cleaned
maldet(18117): {scan} scan completed on /home/eli/Desktop/hacked/: files 8843, malware hits 0, cleaned hits 0, time 253s
maldet(18117): {scan} scan report saved, to view run: maldet --report 151231-0915.18117
Uh, that was really bad. The directory contains several malware PHP files. Maybe the signature isn’t updated? The file my hosting provider detected was quarantined, and those that were left are probably sophisticated enough to go under the radar.
Update the signature file
Since I turned off the automatic update of signature files, I have to do this manually. As root,
# maldet -u
Linux Malware Detect v1.5
            (C) 2002-2015, R-fx Networks <proj@rfxn.com>
            (C) 2015, Ryan MacDonald <ryan@rfxn.com>
This program may be freely redistributed under the terms of the GNU GPL v2

maldet(15175): {sigup} performing signature update check...
maldet(15175): {sigup} local signature set is version 2015121610247
maldet(15175): {sigup} latest signature set already installed
Well, no wonder, I just installed maldet.
So the bottom line, mentioned above, is that this tool isn’t all that effective against the specific malware I got.
USB 3.0 is slowly becoming increasingly common, and it’s a quiet revolution. These innocent-looking blue connectors don’t tell the little secret: They carry 4 new data pins (SSTX+, SSTX-, SSRX+, SSRX-), which will replace the existing D+/D- communication pins one day. Simply put, USB 3.0 is completely standalone; it doesn’t really need those D+/D- to establish a connection. Today’s devices and cables carry both USB 2.0 and USB 3.0 in parallel, but that’s probably a temporary situation.
This means that USB 3.0 is the line where backward compatibility will be cut away. Unlike many other hardware standards (the Intel PC in particular), which drag along legacy compatibility forever, USB will probably leave USB 2.0 behind, sooner or later.
It took me quite some effort to nail this down, but the USB 3.0 specification makes it quite clear on section 3.2.6.2 (“Hubs”):
In order to support the dual-bus architecture of USB 3.0, a USB 3.0 hub is the logical combination of two hubs: a USB 2.0 hub and a SuperSpeed hub. (…) The USB 2.0 hub unit is connected to the USB 2.0 data lines and the SuperSpeed hub is connected to the SuperSpeed data lines. A USB 3.0 hub connects upstream as two devices; a SuperSpeed hub on the SuperSpeed bus and a USB 2.0 hub on the USB 2.0 bus.
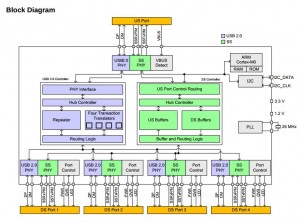
In short: a USB 3.0 hub is two hubs: One for 3.0 and one for 2.0. They are unrelated. The buses are unrelated. This is demonstrated well in the following block diagram shown in Cypress’ HX3 USB 3.0 Hub Datasheet (click to enlarge).
Even though any device is required to support both USB 2.0 and USB 3.0 in order to receive a USB 3.0 certifications (USB 1.1 isn’t required, even though it’s allowed and common), USB 3.0 is self-contained. The hotplug detection is done by sensing a load on the SuperSpeed wires, and all other PHY functionality as well.
An important conclusion is that a USB 3.0 hub won’t help those trying to connect several bandwidth-demanding USB 2.0 devices to a single hub, hoping that the 5 Gb/s link with the computer will carry the aggregation of 480 Mbit/s bandwidth from each device. There will still be one single 480 Mb/s link to carry all USB 2.0 devices’ data.
Having said all the above, there is a chance that the host may expect to talk with a physical device through both 2.0 and 3.0. For example, it may have some functionality connected to USB 2.0 only, and some to 3.0, through an internal hub. This doesn’t contradict the independence of the buses, but it may cause problems if SuperSpeed-only connections are made, as offered by Cypress’ Shared Link (TM) feature.
But the spec doesn’t encourage those USB 2.0/3.0 mixes, to say the least. Section 11.3 (“USB 3.0 Device Support for USB 2.0″) says:
For any given USB 3.0 peripheral device within a single physical package, only one USB connection mode, either SuperSpeed or a USB 2.0 speed but not both, shall be established for operation with the host.
And there’s also the less clear-cut sentence in section 11.1 (“USB 3.0 Host Support for USB 2.0″):
When a USB 3.0 hub is connected to a host’s USB 3.0-capable port, both USB 3.0 SuperSpeed and USB 2.0 high-speed bus connections shall be allowed to connect and operate in parallel. There is no requirement for a USB 3.0-capable host to support multiple parallel connections to peripheral devices.
The same is said about hubs on section 11.2 (“USB 3.0 Hub Support for USB 2.0″), and yet, it’s not exactly clear to me what they mean by saying that the parallel connections should be allowed, but not multiple parallel connections. Probably a distinction between allowing the physical layers to set up their links (mandatory) and actually using both links by the drivers (not required).
So one day, it won’t be possible to connect a USB 3.0 device to an old USB 2.0 plug. Maybe that day is already here.
USB 3.0 over fiber?
These SuperSpeed wires are in fact plain gigabit transceivers (MGT, GTX), based upon the same PHY as Gigabit Ethernet, PCIe, SATA and several others (requiring equalization on the receiver side, by the way). So one could think about connecting these four wires to an SFP+ optical transceiver and obtain a fiber link carrying USB? Sounds easy, and maybe it is, but at least these issues need to be considered:
- The USB 3.0 spec uses low-frequency signaling (10-50 MHz) to initiate a link with the other side. SFP+ transceivers usually don’t cover this range, at least not in their datasheets (it’s more like 300-2500 MHz or so). So this vital signal may not reach the other side properly, and hence the link establishment may fail.
- The transmitter is required to detect if there’s a receiver’s load on the other side, by generating a common-mode voltage pulse, and measure the current. SFP+ transceivers may not be detected as loads this way, as they typically have only a differential load between the wires. This is quite easily fixed by adding a compatible signal repeater between the USB transmitter and the SFP+ signal input pair.
- The transmitter will detect a load even if the other side isn’t ready (e.g. there’s nothing connected to the SFP+ transceiver, or the hardware on the other side is off). I haven’t dug into the spec and checked if this is problematic, but in the worst case, the other side’s readiness can be signaled by turning the laser on from the other side. Or actually, not turning it off. SFP+ transceivers have a “Disable Tx laser” input pin, as well as a “Receive signal loss” for this.
- Without investigating this too much, it seems like this fiber connection will not be able to carry traffic for USB 2.0 devices by simple means. It’s not clear if a USB 2.0 to USB 3.0 converter is possible to implement in the same way that USB 1.1 traffic is carried over USB 2.0 by a multi-speed hub: As mentioned above, USB 2.0 is expected to be routed through separate USB 2.0 hubs. Odds are however that once computers with USB 3.0-only ports start to appear, so will dedicated USB bridges for people with old hardware, based upon some kind of tunneling technique.
It seems like hierarchies are to board designers what C++ is to programmers: It kills the boredom, but also the project. They will proudly show you their block diagrams and the oh-so-ordered structure, but in the end of the day, noone can really figure out what’s connected to what. Which is kinda important in a PCB design.
Not to mention that it’s impossible to tell what’s going on looking at the pdf schematics: Try to search for the net’s name, and you’ll find it in 20 places, 18 of which are the inter-hierarchy connections of that net. One of which, is maybe wrong, but is virtually impossible to spot.
On a good day, everything looks fine and in order, and noone notices small killers like the one below. It’s easy (?) to spot it now that I’ve put the focus on it, but would you really see this on page 23 of yet another block connection in the schematics?
Click to enlarge (this is from a real-life design made by a serious company):
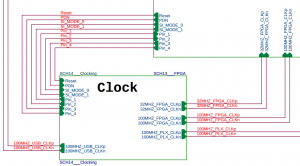 So please, PCB designers, wherever you are: Look at any reference design you can find, and do the same: Just put the net names that belong to another page. Don’t try to show the connections between the blocks. They help nobody. If the net name is meaningful, we will all understand on which page to look for it. And if we don’t, we use our pdf browser’s search feature. Really.
These are my jots as I resized a partition containing an encrypted LVM physical volume, and then took advantage of that extra space by extending a logic volume containing an ext4 file system. The system is an Ubuntu 14.04.1 with a 3.13.0-35-generic kernel.
There are several HOWTOs on this, but somehow I struggled a bit before I got it working. Since I’ll do this again sometime in the future (there’s still some space left on the physical volume) I wrote it down. I mainly followed some of the answers to this question.
The overall setting:
$ ls -lR /dev/mapper
/dev/mapper:
total 0
crw------- 1 root root 10, 236 Nov 17 16:35 control
lrwxrwxrwx 1 root root       7 Nov 17 16:35 cryptdisk -> ../dm-0
lrwxrwxrwx 1 root root       7 Nov 17 16:35 vg_main-lv_home -> ../dm-3
lrwxrwxrwx 1 root root       7 Nov 17 16:35 vg_main-lv_root -> ../dm-2
lrwxrwxrwx 1 root root       7 Nov 17 16:35 vg_main-lv_swap -> ../dm-1

$ ls -lR /dev/vg_main/
/dev/vg_main/:
total 0
lrwxrwxrwx 1 root root 7 Nov 17 16:35 lv_home -> ../dm-3
lrwxrwxrwx 1 root root 7 Nov 17 16:35 lv_root -> ../dm-2
lrwxrwxrwx 1 root root 7 Nov 17 16:35 lv_swap -> ../dm-1
And the LVM players after the operation described below:
lvm> pvs
 PV                    VG      Fmt  Attr PSize   PFree
 /dev/mapper/cryptdisk vg_main lvm2 a--  465.56g 121.56g
lvm> vgs
 VG      #PV #LV #SN Attr   VSize   VFree
 vg_main   1   3   0 wz--n- 465.56g 121.56g
lvm> lvs
 LV      VG      Attr      LSize   Pool Origin Data%  Move Log Copy%  Convert
 lv_home vg_main -wi-ao--- 300.00g
 lv_root vg_main -wi-ao---  40.00g
 lv_swap vg_main -wi-ao---   4.00g
Invoke “lvm” in order to run LVM related commands (probably not really required)
Make LVM detect that I’ve resized the underlying partition (mapped as cryptdisk):
lvm> pvresize -t /dev/mapper/cryptdisk
Now to resizing the logical volume. Unfortunately, the Logical Volume Management GUI tool refused that, saying that the volume is not mounted, but in use (actually, I think it *was* mounted). So I went for the low-level way.
Under “Advanced Options” I went for a rescue boot, and chose a root shell.
Check the filesystem in question
fsck -f /dev/mapper/vg_main-lv_home
Back to the “lvm” shell. A little test, not the -t flag (making lv_home, under vg_main 200 GiB larger):
lvm> lvextend -t -L +200g /dev/vg_main/lv_home
It should write out the desired final size (e.g. 300 GiB)
Then for real:
lvm> lvextend -L +200g /dev/vg_main/lv_home
Oops, I got “Command failed with status code 5″. The reason was that the root filesystem was mount read-only. Fixing that I got “Logical volume successfully resized”.
But wait! There is no device file /dev/vg_main/lv_home
Now resize the ext4 filesystem
resize2fs /dev/mapper/vg_main-lv_home
And run a final check again:
fsck -f /dev/mapper/vg_main-lv_home
And rebooted the computer normally.
I not an expert on this
These are just my what-on-earth-is-going-on-here notes as I tried to understand how my Debian 8.2 (“Jessie”) machine boots up. Conclusion: It’s a mess. More specifically, it’s a weird mix between good-old SystemV init scripts and a nasty flavor of upstart. And they say it’s here to stay. Maybe. But I doubt those init.d scripts will remain for long.
General notes
- systemctl is the Swiss knife. Most notable commands: systemctl {halt, poweroff, reboot}
- Also: systemctl status (for a general view, with PIDs for jobs) or with the name of a service to get more specific info
- For analysis of what’s going on: systemctl {cat, list-dependencies}
- Reload configuration files (after making changes): systemctl daemon-reload
- LSB stands for Linux Standard Base. In systemd context, it’s the standard Linux services
- There are several special units: man systemd.special
- An example for a service definition file (for SSH): /etc/systemd/system/sshd.service. There aren’t so many of these.
The general view
My atd daemon didn’t kick off, so I got this:
(the numbers are process IDs, which is quite nice, but don’t kill them directly — use systemctl for that too)
$ systemctl status
● diskless
    State: degraded
     Jobs: 0 queued
   Failed: 1 units
    Since: Wed 2015-11-11 14:45:42 IST; 4min 39s ago
   CGroup: /
           ├─1 /sbin/init text
           └─system.slice
             ├─dbus.service
             │ └─352 /usr/bin/dbus-daemon --system --address=systemd: --nofork -
             ├─cron.service
             │ └─345 /usr/sbin/cron -f
             ├─nfs-common.service
             │ ├─299 /sbin/rpc.statd
             │ └─342 /usr/sbin/rpc.idmapd
             ├─exim4.service
             │ └─632 /usr/sbin/exim4 -bd -q30m
             ├─systemd-journald.service
             │ └─127 /lib/systemd/systemd-journald
             ├─ssh.service
             │ ├─347 /usr/sbin/sshd -D
             │ ├─639 sshd: fake [priv]
             │ ├─641 sshd: fake@pts/0
             │ ├─642 -bash
             │ ├─666 systemctl status
             │ └─667 systemctl status
             ├─systemd-logind.service
             │ └─349 /lib/systemd/systemd-logind
             ├─system-getty.slice
             │ └─getty@tty1.service
             │   └─402 /sbin/agetty --noclear tty1 linux
             ├─systemd-udevd.service
             │ └─139 /lib/systemd/systemd-udevd
             ├─rpcbind.service
             │ └─266 /sbin/rpcbind -w
             ├─irqbalance.service
             │ └─370 /usr/sbin/irqbalance --pid=/var/run/irqbalance.pid
             └─rsyslog.service
               └─398 /usr/sbin/rsyslogd -n
Networking service who-does-what
What’s about the networking service? Just
$ systemctl
(not necessarily as root) listed all known services (including those that didn’t start), and among others
networking.service loaded active exited LSB: Raise network interfaces.
so let’s take a closer look on the networking service:
$ systemctl status networking.service
● networking.service - LSB: Raise network interfaces.
   Loaded: loaded (/etc/init.d/networking)
  Drop-In: /run/systemd/generator/networking.service.d
           └─50-insserv.conf-$network.conf
        /lib/systemd/system/networking.service.d
           └─network-pre.conf
   Active: active (exited) since Wed 2015-11-11 11:56:35 IST; 1h 16min ago
  Process: 242 ExecStart=/etc/init.d/networking start (code=exited, status=0/SUCCESS)
OK, let’s start with the drop-in file:
$ cat /run/systemd/generator/networking.service.d/50-insserv.conf-\$network.conf
# Automatically generated by systemd-insserv-generator

[Unit]
Wants=network.target
Before=network.target
Not really informative. Note that /run is a tmpfs, so no doubt the file was automatically generated. So what about
$ cat /lib/systemd/system/networking.service.d/network-pre.conf
[Unit]
After=network-pre.target
Even more internal mumbo-jumbo. So much for the drop-ins.
Now, why am I working so hard? There the “cat” command!
$ systemctl cat networking.service
# /run/systemd/generator.late/networking.service
# Automatically generated by systemd-sysv-generator

[Unit]
SourcePath=/etc/init.d/networking
Description=LSB: Raise network interfaces.
DefaultDependencies=no
Before=sysinit.target shutdown.target
After=mountkernfs.service local-fs.target urandom.service
Conflicts=shutdown.target

# /run/systemd/generator.late/networking.service
# Automatically generated by systemd-sysv-generator

[Unit]
SourcePath=/etc/init.d/networking
Description=LSB: Raise network interfaces.
DefaultDependencies=no
Before=sysinit.target shutdown.target
After=mountkernfs.service local-fs.target urandom.service
Conflicts=shutdown.target

[Service]
Type=forking
Restart=no
TimeoutSec=0
IgnoreSIGPIPE=no
KillMode=process
GuessMainPID=no
RemainAfterExit=yes
SysVStartPriority=12
ExecStart=/etc/init.d/networking start
ExecStop=/etc/init.d/networking stop
ExecReload=/etc/init.d/networking reload

# /run/systemd/generator/networking.service.d/50-insserv.conf-$network.conf
# Automatically generated by systemd-insserv-generator

[Unit]
Wants=network.target
Before=network.target

# /lib/systemd/system/networking.service.d/network-pre.conf
[Unit]
After=network-pre.target
Say what? The actual networking.service was generated on the fly? Based on what?
Say what II? /etc/init.d/networking??? Really? Besides, what’s all those /etc/rcN.d/ directories? Are they used for something?
OK, so it goes like this: According to systemd-sysv-generator’s man page (the program that generated these service files) scans through /etc/init.d/* and reads through their LSB headers. It probably also scanned /etc/rcS.d, where it found S12networking symlinking to ../init.d/networking. That’s where it got the SysVStartPriority=12 part, I suppose.
So this is how systemd emulated SystemV.
Netwoking service: What actually happens
- Systemd calls /etc/init.d/networking start (systemctl status networking.service supplied that info)
- /etc/init.d/networking runs /etc/default/networking (if it exists), which allows overriding the parameters
- Then calls “ifup -a”, unless CONFIGURE_INTERFACES has been set to “no”, and with due exclusions
References
… with one little difference: It seems like you can install Windows 10 without any product key. According to this post, one can install Windows 10 from scratch, and when prompted for the product key, click “Skip for now”. Twice. The installation will have this “Activate Now” watermark, and personalization will be off. But otherwise, the post says, everything will work fine. Never tried this myself, though.
Either way, it’s the regular Windows 10 you want to download. Not the N or KN or something.
Wanting to be sure that some driver I’ve released will work with Windows 10, I upgraded from Windows 7, where the driver was installed, to Windows 10.
To my great surprise, Windows 10 started with the same desktop, including program shortcuts, all running as before. Only a new look and feel, which resembles Windows 8, just slightly less annoying.
I should mention that at the “Get going fast” stage of the installation, I went for Customize Settings and turned off basically everything. That’s where all the “Send Microsoft X and Y” goes.
The real surprise was that my own driver was already installed and running on the upgraded Windows 10. If I was looking for a sign that everything is the same under the hood, an automatic adoption of already installed driver is a good one. I don’t think Microsoft would risk doing that unless there was really nothing new.
Needless to say, removing the driver and reinstalling it went as smooth as always. Same device manager, same everything.
IMPORTANT: For a bare-metal install, boot the USB stick with the ISO image (possibly generated with winusb under Ubuntu) in non-UEFI mode, or the installer refuses to use existing MBR partitions (unless the partition table is GPT anyhow).
VirtualBox installation notes
Jots while installing a fresh Windows 10 on VirtualBox v4.3.12 under 64-bit Linux. Correction: I eventually upgraded to v5.0.12, which lists Windows 10 as a target OS. This was required to make the Windows Addons work.
- Set OS to Other Windows 32 bit (I suppose other Microsoft selections will work as well)
- Under processor, enable PAE/NX
- Attempting a 64-bit installation got stuck on the initial Windows splash image, no matter what I tried (maybe this was solved with 5.0.12, didn’t try this)
- Turn off screen saver after installation
- The installation will ask for the product key in two different occasions during the installation. Just skip.
- Didn’t work:
In order to install VirtualBox Windows Additions, pick Devices > Insert Guest Additions CD Image… on the hosts’s VirtualBox menu. Then start the virtual machine. VirtualBox v4.3.12 doesn’t support Windows 10, so refuse the automatic run of the CD. Instead, browse the disc’s content and right-click VBoxWindowsAdditions-x86.exe. Choose Properties. Pick the Compatibility tab, check “Run this program in compatibility mode” and pick Windows 8 (as suggested on this post). Then run this program, which will then install the drivers properly. Windows will complain that the display adapter doesn’t work, but that’s fine. Just reboot.
Pretty much as a side note, I should mention that the firmware should and can be loaded with a Windows utility named K2024FWUP1.exe. Get it from whereever you can, and verify it isn’t dirty with
$ shasum K2024FWUP1.exe
c9414cb825af79f5d87bd9772e10e87633fbf125  K2024FWUP1.exe
If this isn’t done, Window’s Device Manager will say that the device can’t be started, and Linux kernel will complain with
pci 0000:06:00.0: xHCI HW not ready after 5 sec (HC bug?) status = 0x1801

[...]

xhci_hcd 0000:06:00.0: can't setup: -110
xhci_hcd 0000:06:00.0: USB bus 3 deregistered
xhci_hcd 0000:06:00.0: init 0000:06:00.0 fail, -110
xhci_hcd: probe of 0000:06:00.0 failed with error -110
Now to the Linux part. This is just the series of commands I used to read from the firmware ROM of a Renesas USB controller detected as:
# lspci -s 06:00
06:00.0 USB controller: Renesas Technology Corp. uPD720202 USB 3.0 Host Controller (rev 02)
The point was to check if the ROM was erased (it was). I followed the instructions in the “μPD720201/μPD720202 User’s Manual: Hardware” (R19UH0078EJ0600, Rev.6.00), section 6.
Check if ROM exists:
# setpci -s 06:00.0 f6.w
8000
Bit 15=1, so yes, ROM exists. Check type and parameter:
# setpci -s 06:00.0 ec.l
00c22210
# setpci -s 06:00.0 f0.l
00000500
OK, according to table 6-1 of the Hardware User Manual, it’s a MX25L5121E.
Write magic word to DATA0:
# setpci -s 06:00.0 f8.l=53524F4D
Set “External ROM Access Enable”:
# setpci -s 06:00.0 f6.w=8001
Check “Result Code”:
# setpci -s 06:00.0 f6.w
8001
Indeed, bits 6:4 are zero — no result yet, as required for this stage in the Guide.
Now set Get DATA0 and Get DATA1, and check that they have been cleared:
# setpci -s 06:00.0 f6.w=8c01
# setpci -s 06:00.0 f6.w
8001
Get first piece of data from DATA0:
# setpci -s 06:00.0 f8.l
ffffffff
The ROM appears to be erased… Set Get DATA0 again, and read DATA1 (this is really what the Guide says)
# setpci -s 06:00.0 f6.w=8401
# setpci -s 06:00.0 fc.l
ffffffff
Yet another erased word. And now the other way around: Set Get DATA1 and read DATA0 again:
# setpci -s 06:00.0 f6.w=8801
# setpci -s 06:00.0 f8.l
ffffffff
And the other way around again…
# setpci -s 06:00.0 f6.w=8401
# setpci -s 06:00.0 fc.l
ffffffff
When done, clear “External ROM Access Enable”
# setpci -s 06:00.0 f6.w=8000
This rewinds the next set of operation to the beginning, of the ROM, as I’ve seen by trying it out, even though the Guide wasn’t so clear about it. So if the sequence shown above starts from the beginning, we read the beginning of the ROM again.
Again, with the ROM loaded with firmware
# setpci -s 06:00.0 f6.w
8000
# setpci -s 06:00.0 f8.l=53524F4D
# setpci -s 06:00.0 f6.w=8001
# setpci -s 06:00.0 f6.w
8001
# setpci -s 06:00.0 f6.w=8c01
# setpci -s 06:00.0 f6.w
8001
# setpci -s 06:00.0 f8.l
7da655aa
# setpci -s 06:00.0 f6.w=8401
# setpci -s 06:00.0 fc.l
00f60014
# setpci -s 06:00.0 f6.w=8801
# setpci -s 06:00.0 f8.l
004c010c
# setpci -s 06:00.0 f6.w=8401
# setpci -s 06:00.0 fc.l
2ffc015c
# setpci -s 06:00.0 f6.w=8801
# setpci -s 06:00.0 f8.l
0008315c
# setpci -s 06:00.0 f6.w=8401
# setpci -s 06:00.0 fc.l
1a5c2024
# setpci -s 06:00.0 f6.w=8000
I stopped after a few words, of course. Note that the first word is indeed the correct signature.